Singleton & Scalable — How to Setup Redis Optimally to Avoid Severe Cost Implications
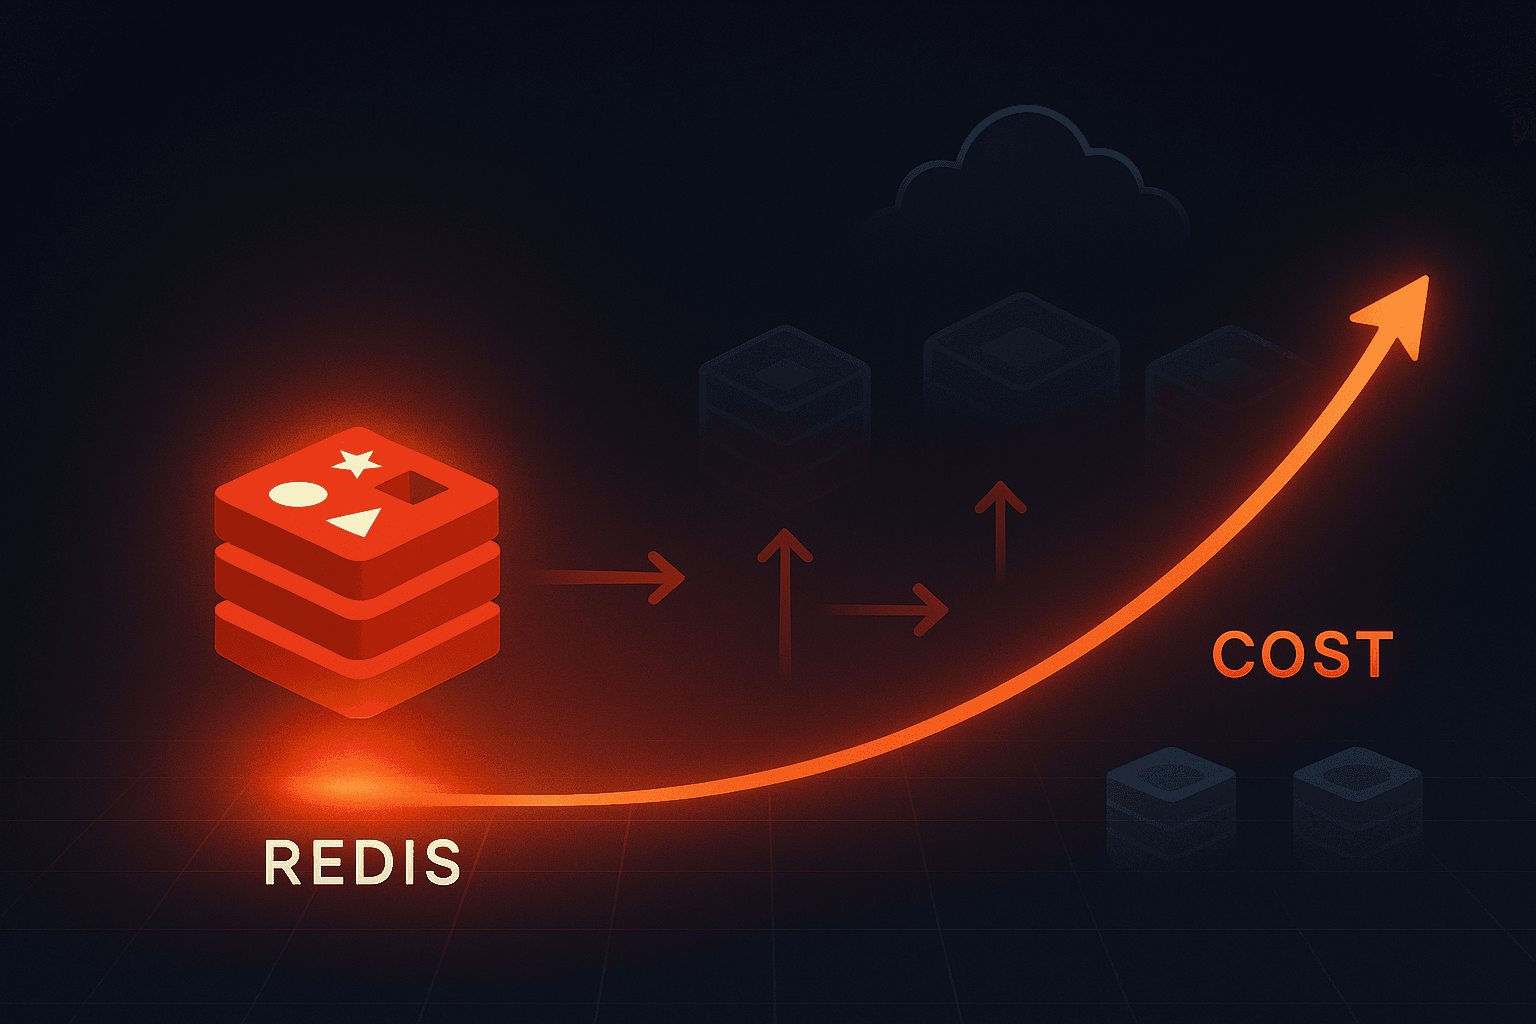
"Prevent a Redis setup nightmare that could blow your budget, with a single line of code." While I admit my initial intended title here would have come off a bit too dramatic for a technical guide, it's—in reality—not far from the truth.
This article stems from an experience I had with Redis. On a five-person data engineering team (3rd-party integrations and analytics), the app staging server kept crashing over a weekend, despite multiple troubleshooting attempts.
The initial assumption was a payload issue, given the volume of data. However, the root cause turned out to be multiple Redis client instances triggering unhandled exceptions.
This is a comprehensive guide, so if you'd like to jump ahead, feel free to skip to the section that interests you most via the table of contents.
In a nutshell, I solved the issue using the singleton pattern I describe in this article. But let's not get ahead of ourselves. Before we delve deeper, let's take a quick look at the fundamentals.
Overview: What is Redis Cache?
Redis (Remote Dictionary Server) is an open-source, in-memory data store primarily used to improve application performance and reduce database load. By bypassing the slower disk access, Redis achieves read and write speeds that are orders of magnitude faster, making it a popular choice for various caching and data storage needs.
For context, while specific performance benchmarks can vary depending on hardware, workload, and configuration, it's not uncommon to see Redis perform read and write operations in microseconds or even nanoseconds, compared to milliseconds or seconds for disk-based databases.
Now you must be thinking:
If in-memory storage is that much faster, why not just totally replace disk-based databases with RAM stores like Redis?
Hold that thought. Being magnitudes faster also makes RAM magnitudes more expensive. For instance, DDR4 main memory costs around $3.2 per GB, while SSD storage costs about $0.10 per GB. Not only would such a replacement be overkill, it's borderline infeasible at scale.
When to use Redis
Redis is particularly well-suited for the following use-cases:
- Caching frequently accessed data such as product information or user profiles and other master data.
- Storing user sessions to reduce database load and improve performance.
- Analytics and streams. Processing and analyzing real-time data streams for analytics and insights.
- Rate-limiting. Controlling the frequency of requests to prevent abuse and protect system resources.
When Not to Use Redis
Here are use-cases where Redis should not be your first choice:
-
Long-term data storage: Redis stores data in memory, making it costly and less reliable than dis storage for persistence.
-
Large, complex datasets: Redis's key-value structure is not designed for advanced querying or managing complex relationships, unlike relational or document databases.
-
High-write workloads: Redis handles read and write operations OK, but for sustained large write-heavy workloads exceeding memory, solutions like Cassandra are better suited.
-
Strict ACID compliance: Redis cache provides eventual consistency - serving data that may lag behind the latest update. Relational DB's will serve here as well.
Now that let's delve into the day's business. Setup.
How to Set up Redis Cache in your application
In this guide, I aim to show you how to install and set up Redis cache optimally for your server, using the singleton design pattern or otherwise. The main goal here being to set up a centralized Redis configuration, making it easy to manage caching across different parts of your app while using a single Redis instance.
While the focus here is on caching, this setup can also be used for other purposes, such as rate-limiting and session storage. Also, I use Typescript and NodeJs here but other technologies can be adapted to the patterns I describe in this article.
Prerequisites
Ensure you have the following if you plan to code along with the steps in this guide:
-
Basic Node.js and TypeScript Knowledge: Familiarity with core Node.js concepts, such as modules, packages, and object-oriented programming, along with an understanding of TypeScript syntax and type annotations, is recommended.
-
A Node.js Project: Create a new Node.js project or use an existing one.
-
A Node package manager: One of either npm or Yarn installed on your machine.
Step 1: Installing Redis Server
I will cover the installation and setup of Redis on macOS and Linux. Note that Redis isn't officially supported on Windows, but you can still install and set it up using the walk-around I will provide later in this section.
A. Install Redis on MacOS
First, we'll use Homebrew to install Redis. Check if Homebrew is installed on your machine by verifying the version with the command:
$ brew --version
# Sample output: Homebrew 4.0.0
If you get a version number as shown above, then you have brew installed. Else, you get the brew: command not found output, which means you need to install brew.
To install Brew, refer to the Homebrew installation guide. Once that is done, you can proceed to install Redis.
Next, install Redis on macOS using Homebrew by running the command:
$ brew install redisTo confirm your Redis installation is successful, run the Redis-server command:
$ redis-serverIf it's successful, the command outputs the startup logs.
You can press Ctrl + C at any time to terminate the Redis process.
B. Install Redis on Linux
Install Redis on Ubuntu by following the instructions below. First, check if apt package manager is installed by verifying the version using the command:
$ apt --versionThen, install Redis on Linux by running:
$ sudo apt install redis-serverTest your Redis installation by starting the Redis server with the command:
$ redis-serverIf the Redis server starts successfully, you should see an output indicating that Redis is running and listening on a specific port (usually 6379).
C. Install Redis on Windows
Redis is not officially supported on Windows, but you can circumvent this using the Windows Subsystem for Linux (WSL) on Windows 10 or later. Check out Naveen's Redis Windows installation guide or the Redis for Windows 11 article on the official Redis blog for more info on Windows installation.
If you encounter any unaddressed issue during the Redis installation, refer to the Redis official documentation to fix them.
Step 2: Installing the Redis client
There are two major options when it comes to a Redis Client for NodeJS, node-redis and ioredis. My preferred choice for this guide is ioredis, as it's open-source, written in TypeScript, boasts 2M+ weekly downloads, and is known for its high scalability and performance.
Installing ioredis on your nodeJS project
Install the ioredis package in your Node.js project with the following command:
# Using npm:
$ npm install ioredis

# Using yarn:
$ yarn add ioredis
This will install ioredis and add it to your package.json file, giving you access to Redis functionalities such as caching, Pub/Sub, key management, and more.
Once installed, you can proceed with setting up Redis caching or implementing other Redis features to optimize data retrieval and reduce the load on your database.
Now that we've got the installations out of the way, time to get to the more fun coding part.
Step 3: Setting up a Redis Utility Class
Pay close attention here. A poor Redis setup can lead to performance issues and difficult-to-debug errors, or even worse, serious cost implications.
We'll create a CacheUtil class to centralize all Redis interactions. This ensures that Redis connections are well-organized and maintainable, also providing a single point of control for all Redis operations across the app.
Create the Utility Class and Initialize Redis Client
For this guide, the Redis URL is saved in api-gateway.config.ts. If no Redis URL is specified, it defaults to port 6379.
// cache-util.ts

import Redis from "ioredis";
import apiGatewayConfig from "config/api-gateway.config";

export default class CacheUtil {
	private client: Redis;

	// Set connection details — from config or default
	private readonly redisUrl =
		apiGatewayConfig.redis.url || "redis://localhost:6379";

	constructor() {
		// Initialize Redis client — WITHOUT Singleton pattern
		this.client = new Redis(this.redisUrl);
	}

	// next - Redis operations
}
Add Redis operation methods [Multiple instances]
Here you’ll create a utility class to handle common Redis operations like set, get, del, and hset. These methods will be essential for caching data in Redis, allowing you to store and retrieve values efficiently.
By encapsulating these operations in one class, you get to avoid repetitive code and interact with the Redis server in a consistent way, making caching management and maintainability easier.
// cache-util.ts

import Redis from "ioredis";

export default class CacheUtil {
	private client: Redis;

	private readonly redisUrl =
		apiGatewayConfig.redis.url || "redis://localhost:6379";

	constructor() {
		// Initialize Redis client — [without] Singleton pattern
		this.client = new Redis(this.redisUrl);
	}

	//  Redis operations methods
	public async get(key: string): Promise<string | null> {

		return this.client.get(key);
	}

	public async del(key: string): Promise<void> {
		await this.client.del(key);
	}

	public async hset(key: string, field: string, value: string): Promise<void> {


		await this.client.hset(key, field, value);
	}

	public async quit(): Promise<void> {


		await this.client.quit();
	}
}
Now that's one way to go about it—a multiple-instance pattern. A usage example of this method of creating multiple instances of the CacheUtil class may look something like this:
// user.service.ts
import CacheUtil from "./path/to/CacheUtil";

export default class UserService {
	private cache: CacheUtil;

	constructor() {
		// Creates a new instance of CacheUtil
		this.cache = new CacheUtil();
	}

	// Set a user name in Redis cache
	async setUser(id: string, name: string) {
		await this.cache.set(`user:${id}`, name);
	}

	// Get a user name from Redis cache
	async getUser(id: string) {
		return await this.cache.get(`user:${id}`);
	}
}
The multiple-instance approach works if you're working with a highly concurrent application that needs to support over 100k-200k operations per second, and requires 100% reliability—zero downtime with consistent performance. But there's a major caveat:
Each time you initialize the
CacheUtilclass, a new Redis client is created, and a separate connection is established with the Redis server. This is inefficient, especially in applications with multiple services calling the Redis client, as each client instance consumes memory and creates additional connections.
In our case (my team), we maxed out a Redis instance with just 50 connections. A single service would initialize over 10 Redis connections, quickly exceeding the limit, and crashing the server with the error below:
[ioredis] Unhandled error event: ReplyError: ERR max number of clients reached; Connection pooling can mitigate this inefficiency by reusing a limited set of connections, but the implementation is relatively complex and is typically implemented at the Redis client library provider level as stated in the Redis multiplexing docs.
However, for most use cases, the singleton pattern on a single Redis instance is sufficient: A Redis instance does not have to support over 100k op/s, at least not in the early days, since occasional downtime is acceptable given an expectation of eventual consistency.
Now let's see how the singleton pattern solves this issue.
Step 4: Implementing the Singleton Design Pattern
The singleton design pattern ensures that a class has only one instance throughout its lifecycle and provides a global access point to that instance. To implement this with the CacheUtil class, we create a getInstance() static method.
This method acts as the only point of access to the CacheUtil instance, ensuring that every time it is called, it returns the same Redis client. Thus, preventing the redundant creation of multiple Redis client instances.
export default class CacheUtil {
  private static instance: CacheUtil;
  private client: Redis;
  private readonly redisUrl: string;

   constructor() {
    this.redisUrl = 'redis://localhost:6379'; // Or use a config value
    this.client = new Redis(this.redisUrl);
  }

  //  If available, get the open instance,
  public static getInstance(): CacheUtil {
    if (!CacheUtil.instance) {
      CacheUtil.instance = new CacheUtil();
    }
    return CacheUtil.instance;
  }

  // Redis operations methods
  public async set(key: string, value: string, ex: number = 60 * 60 * 24 * 30): Promise<string> {
    return this.client.set(key, value, 'EX', ex);
  }

  public async get(key: string): Promise<string | null> {
    return this.client.get(key);
  }

  // other operation methods...
}
Whenever getInstance() is called, the logic checks if there’s already an instance; if not, it initializes a new CacheUtil(). This way, we efficiently reuse a single Redis client connection, saving resources and avoiding redundant connections across the application. Here's a usage example:
// user.service.ts

export default class UserService {
  private cache = CacheUtil.getInstance();

  async setUser(id: string, name: string) {
    await this.cache.set(`user:${id}`, name);
  }

  async getUser(id: string) {
    return await this.cache.get(`user:${id}`);
  }

}
Compare the number of connections in the Client list
To check the number of connections on a Redis instance on your local server, you can use the CLIENT LIST command on the Redis-cli on your terminal or go via the Redis Insight software CLI. Ensure your server is active—particularly the services that use Redis, then open the Redis CLI and run the commands below:
# Start the Redis CLI:
$ redis-cli

# Retrieve the list of connected clients:
$ CLIENT LIST
The output should look like this:
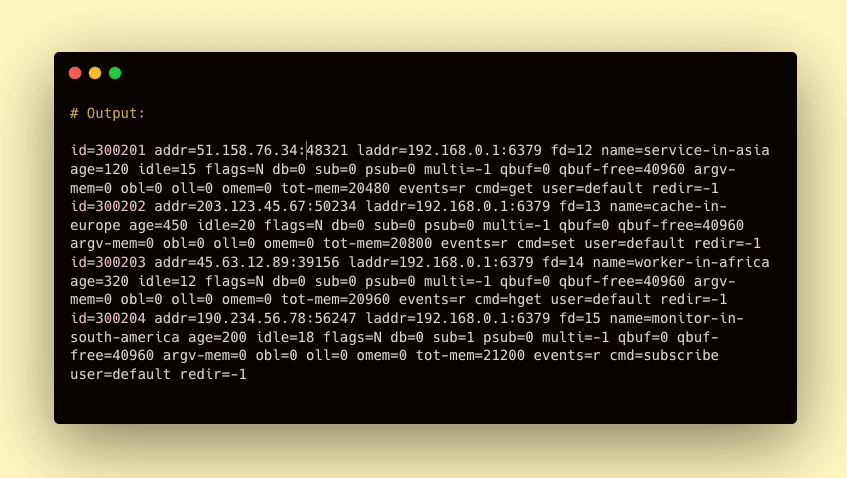
Note the number of connected clients using the id field, alongside their properties
(age, addr, flags, etc.). When you compare the connection numbers under sustained
usage, you’ll notice that a Singleton instance typically maintains significantly
fewer connections—ideally one per client or application—and this count remains
stable regardless of the number of services that call the CacheUtil class.
There you go! You just saved yourself from sleepless nights and potential billing headaches from services like AWS's ElastiCache with a single static method. 🎉
But that's not exactly a "one-liner" is it?
You're not wrong; while I chose to prioritize readability for the sake of this guide, a little tweak and you would have this to work with:
public static getInstance = (): CacheUtil => CacheUtil.instance ? CacheUtil.instance : (CacheUtil.instance = new CacheUtil()); // A one-liner implementationPromise fulfilled. And of course, pun intended. 🙂
Now let's evaluate the fundamental differences between singleton vs. multi-instance setups.
Table: Singleton vs. Multiple-instance pattern
The choice between Singleton and Multiple-Instance patterns significantly impacts your entire system. So, I prepared a comprehensive table to help you determine the best fit for your needs:
| Factor | Singleton Pattern | Multiple-Instance Pattern |
|---|---|---|
| Definition | A single Redis client instance shared across the app. | Multiple Redis client instances, mostly managed in a pool. |
| Scalability | Scales vertically; good fit for monolithic servers. May bottleneck under extremely high load (over 100k op/s) due to shared connection. | Multiple connections may exceed the instance's maxClients limit, crashing the server. Scales better with distributed connections. |
| Complexity | Simple to implement and manage, just a few lines of code as seen with the getInstance() method. | More complex, requiring a connection pool at the least. |
| Resource Usage | Relatively minimal, as only one connection is maintained. | Higher usage, with multiple concurrent connections. |
| Concurrency handling | Limited, since all requests share the same connection. | Better, as each request uses its own connection. |
| Fault Tolerance | Vulnerable if the single connection fails and 100% reliability is needed. | More resilient within a cluster, failures affect only one connection. |
| Cost Implication | Lower cost, typically requires a single Redis server. | Higher cost, as multiple Redis servers or clusters may be needed to handle the load. |
| Use Cases | Best for simple applications, low to medium traffic APIs, or basic caching needs. | Ideal for micro-services, distributed systems, or applications with high-concurrency requirements. |
Conclusion
At scale, minor-seeming inefficiencies in your Redis connections could lead to serious operational problems due to escalating overhead and connection exhaustion, turning it from a mere performance quirk into a direct hit on the bottom line.
So far, I have highlighted the importance of actively managing Redis client connections in the server logic, especially in simple to medium scale applications. So far you've learnt the following:
- What Redis cache is and when to use it.
- How to set up Redis in your app, including installation and client configuration.
- Where to use the Singleton pattern vs. Multiple-Instance patterns.
And by the way, the singleton design pattern described here can be applied to systems beyond Redis, including database clients like Prisma, and even other programming languages.
Finally, don't forget to implement robust error handling, logging, and retry mechanisms to maintain stability, prevent unexpected failures, and help you and your team sleep better at night. Because I promise you, those Saturday night server crashes did hit different.

ABOUT THE AUTHOR
Yusuf Abdulhafeez is a software engineer and technical writer, known for his work at Incogniton, Rumi, YoLoop, and beyond. He crafts educative content across various technical domains, including Device intelligence, Fingerprinting, general online privacy, and software development concepts, reaching over a million readers with his insights.
When he's not on his work desk, you may find him outdoor running, working out in the gym, reading a book, or cheering for Arsenal FC.